
Abduzeedo - graphic design | design inspiration | tutorials - |

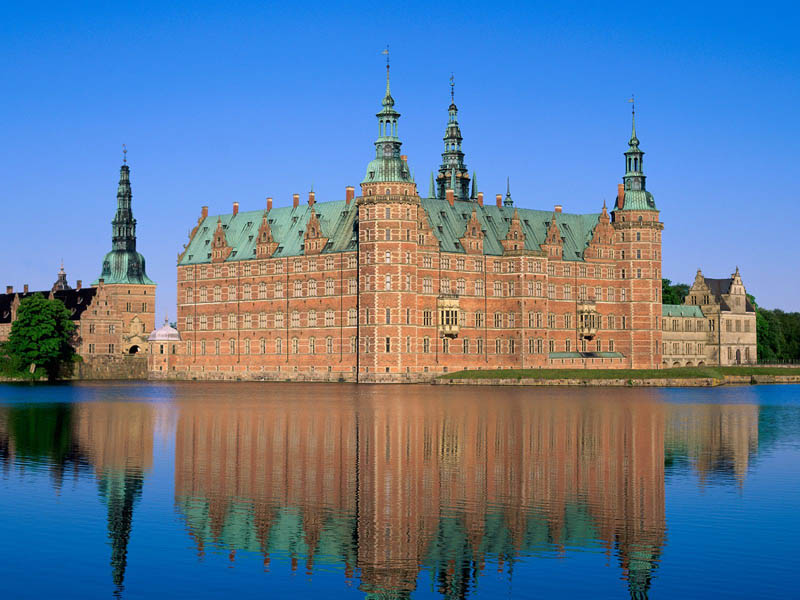
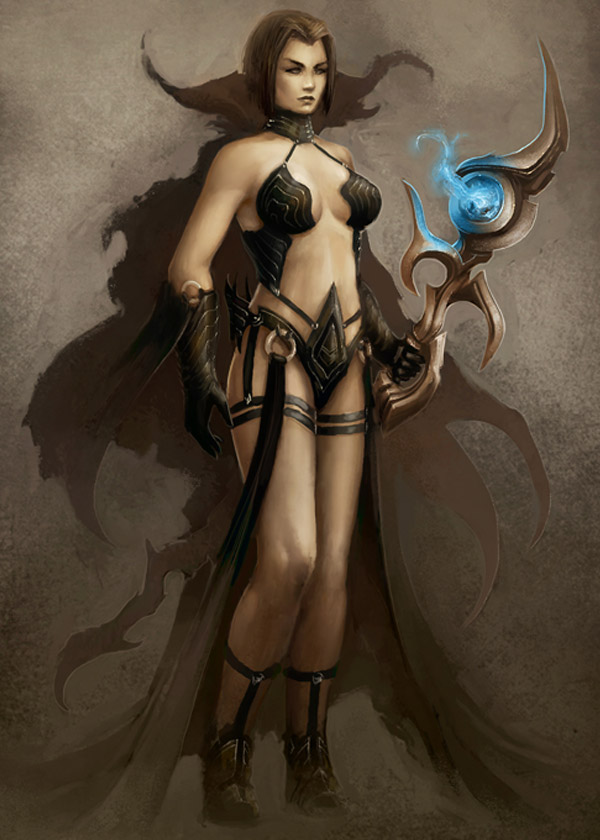
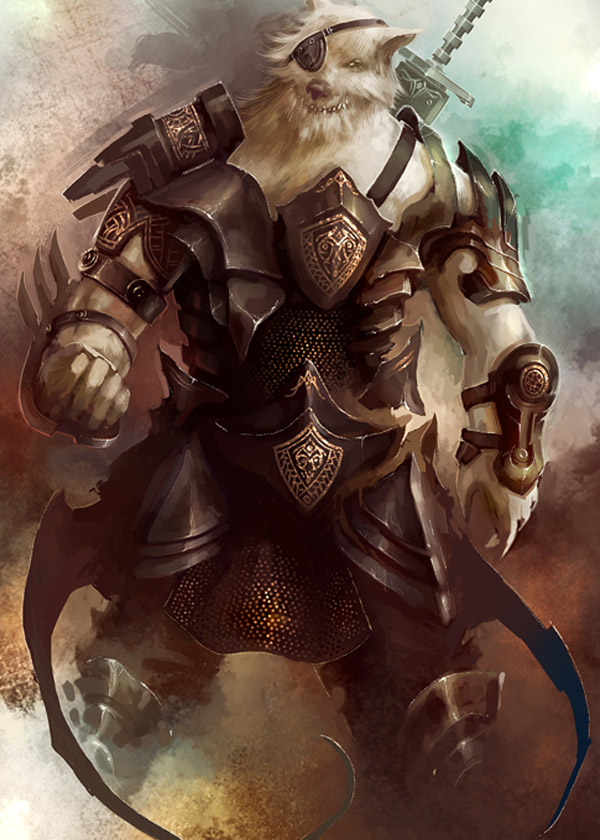
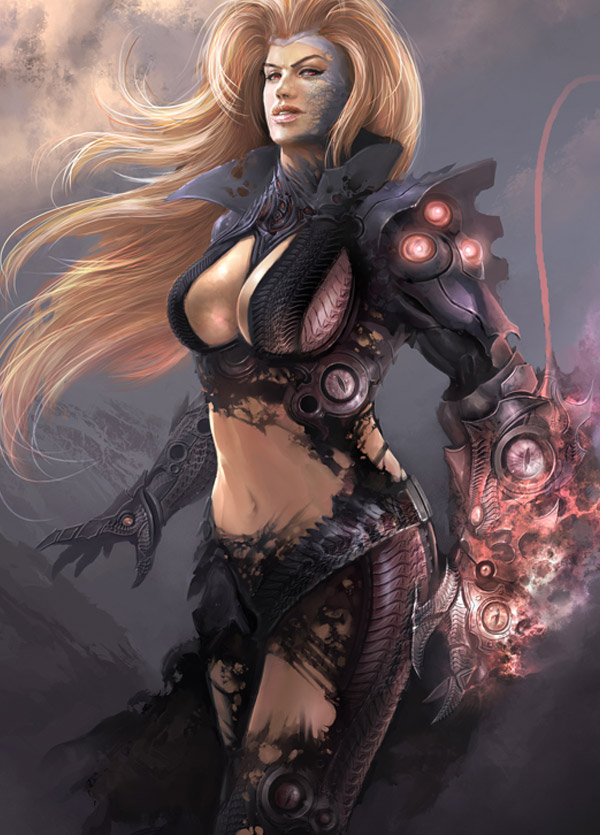
- Daily Inspiration #865
- Independence Day Fireworks
- Interview with Graphic Designer Destill/Mike Harrison
- Custom Chalk Lettering by Dana Tanamachi
- Easy 3D Globe in Photoshop
| Posted: 04 Jul 2011 01:04 PM PDT
This post is part of our daily series of posts showing the most inspiring images selected by some of the Abduzeedo's writers and users. If you want to participate and share your graphic design inspiration, just send us, via email, the image with the link from where you found it, also use "Daily Inspiration" in the subject, and don't forget to send your Abduzeedo username; or via Twitter sending to http://twitter.com/abduzeedo.<!--break--> If possible use the HTML code: <p class="imgC"><a href="Link to the page you found the image"><img src="Link to the Image" /></a></p> Do you want to see all images from all Daily Inspirations? Check out http://daily.abduzeedo.comAdam
admin_tutorialstorage
agun422
al b sure
alex tass
Arthur Presser
Best Bookmarks
blackandwhite
Carlos A. Chong
Chris3290
Christopher Raymond
Edward McGowan
Fabiano
Fabio
fantasyinspiration
Feature Me
fksd
Gisele
Gustavo Pastorino
HdK
Jurgen Doe
leaflette
MadDyn
Maiquei Prote
Meng To
m e s k a l A R T
nenuno
nerdyNerd
Newyorkiz
Oliver13
rad
SuperBruut
Tara Uppal
thaeger
Visions Paradox
ZAC
Via TwitterSend your suggestions via Twitter to http://twitter.com/abduzeedo using #abdz in the end of the tweet. @letmebeinspired
@tutorialstorage
 |
| Posted: 04 Jul 2011 09:29 AM PDT
Happy 4th July to all our readers, today is independence day here in America and I selected some awesome 4th July firework photos from past years so you can enjoy and get ready for tonight!<!--break--> If you have some firework photography from the past years, share with us on the comment area. About the authorHi there! I'm Paulo Canabarro, 25 years old, Brazilian web designer based in Providence RI, USA. I'm truly passionate about design of all kinds. Finding and sharing inspiration has become part of my life. If you have any suggestions or requests just get @ me - pvpcanabarro@gmail.com For some cool stuff make sure to Follow me on twitter! Sponsored Links:
|
| Interview with Graphic Designer Destill/Mike Harrison Posted: 04 Jul 2011 09:08 AM PDT
A few weeks ago, I met Mike Harrison at the OFFF festival in Barcelona. We had a little chat and I decided to interview him for abdz. Read all you have to know about the graphic designer & illustrator from England<!--break-->
First of all we would like to thank you for taking the time to provide abduzeedo.com with this interview. Please tell us more about your art and design background and what made you become an artist and designer?No problem! My background in art started over 10 years ago when I opened my first Adobe application, Flash. My memory is foggy as to how I found out about it in the first place but I started playing around and making some (quite bad) animations and really enjoyed it. I think it was just a phase as I stopped using it after a few weeks as I needed to focus on school. It was many years later that my older brother showed me some images that he'd been making and I was intrigued how he'd created them. He then told me about Photoshop and so I got myself a copy and started playing around and experimenting myself. A year or so later when I started university I had the time to use the program more and more and use it to create some of the work for my course. Then pretty much throughout the next 4 years of my university life I self taught myself Photoshop as well as a number of other programs in the Adobe family as I wanted to be disciplined in as many fields as possible. After university I was proud to start a fulltime job as a designer, using the skills I'd taught myself over all those years. Almost 2 years later I quit that job to do some travelling in South East Asia and Argentina, then when I got back I decided to jump into the world of freelance, and that's where I am now, living and working in London!
How did you come up with your style, what made you explore more this style and what in your opinion is the main characteristic of it?I would say that I like to cover a range of styles; I would also say that I have a favourite style that I like to work in which is mixing the digital with traditional. Over the years I tried out an assortment of different styles and techniques and the one that I enjoyed the most was using a combination of stock imagery, watercolour and paint textures and hand drawn sketches. I felt that it gave me a more unique look to my work and could be recognised as my own.
How would you break down your workflow in steps?I almost always start with a really basic sketch, just to test out the idea in its most basic form to see if I have a basis for a new illustration. From there I decide what medium(s) and programs I will be using and prepare anything I will need such as a sheet of sketches to be scanned in later on. From there it's straight into creation. I always like to keep an element of 'freestyle' during this process, by that I mean not locking myself down to a finished look early on as I like the idea of a piece evolving naturally and the unexpected turns it could take to possibly become something a lot different from what you first imagined. Once I feel it is complete I will sleep on it for a few days and keep on coming back to see what I could change or add.
What's the importance of the computer in the creative process?Of course it plays a very important part, but if I'm working with a largely hand drawn illustration then I might spend only 25% of my time on the computer composing or testing out some ideas. It all depends on the nature of the work.
Apart from the profits, what type of satisfaction do you get from your work?Even since the very beginning of my adventure in design I still get the same feeling of excitement from creating something new. I always look forward to releasing a new piece of work and showing it around to get feedback from my peers, it helps push you forward. I also get satisfaction from thinking about how lucky I am to be doing this as a career as it started as a hobby and a lot of the time does still feel like that!
What are your favourite 5 websites, and why?Well I really enjoy the social networks Facebook and twitter; I guess you could count them as one. They are a great tool for keeping in touch with friends, connecting with other designers, promoting work and finding cool stuff online. I'm a big fan of motion graphics so I love going through Motionographer and seeing some of the latest amazing animation people are making. Karan Singh's Pig Bimpin is always good as he is a great writer and there's some great reads on there, different from your usual design blog. I really enjoy music so another site I use regularly is SoundCloud, a lot of my favourite producers and dj's are on there sharing their music and releasing exclusive songs now and again. Last but not least Abduzeedo, always loved browsing this as it's updated all the time and packed with interesting things to read and look at!
Any advice for those who are starting out their career? What kind of references are important for those who want to work with this kind of style?I always say to those starting out to practice, practice, and practice. Experiment with styles and techniques, use trial and error and just have fun. Sooner or later you are going to find out what you are good at or what you enjoy the most. Stick with it, don't give up and you'll soon start getting recognition for what you're doing. You will no doubt meet other like- minded people along the way who you can collaborate with and receive critique from. Passion, dedication and hard work are 3 key factors on becoming successful! Where to find him on the webDestill.net - Portfolio More work of this artist
|
| Custom Chalk Lettering by Dana Tanamachi Posted: 04 Jul 2011 08:11 AM PDT
I'm certain that most of you have seen Dana's work floating around the internet somewhere, be it ffffound, tumblr, or wherever. Every time I come across her work, even if it's the 10th time I've seen it, I'm always completely blown away by the level of detail that each piece possesses. Can you believe that no stencils or projectors are used? I've included a few time-lapse videos of the projects being created for your viewing pleasure so be sure to check those out!
Swing on over to Dana's portfolio for more and let me know what you think via twitter!
Ace Hotel Room 1021 from Dana Tanamachi on Vimeo.
Desiron, Soho from Dana Tanamachi on Vimeo.
Nagging Doubt "The Pull" from Dana Tanamachi on Vimeo.
Nagging Doubt Viognier from Dana Tanamachi on Vimeo. |
| Posted: 03 Jul 2011 10:57 PM PDT
A few weeks ago a friend of mine wanted to know how to create a sort of 3D globe effect using Photoshop. I didn't know how to do that but I got really intrigued with that, so I decided to give it a try. I knew that the Spherize would work in this case but didn't know how.So in this tutorial I will show you how to create a nice 3D globe in Photoshop using basic tools and the Spherize filter. This whole tutorial won't take more than 30 minutes but the technique is really useful especially for icons and logos. Step 1Open Photoshop and then with the Rectangle Tool (U) create a rectangle, then start duplicating it until you get 7 columns. Use the Distribute Horizontal Centers to make the distances the same. After that duplicate those 7 rectangles and rotate them to create a grid. Step 2With the Elliptical Marquee Tool (M) create a circle selection like the one I did in the image below. Step 3Go to Filter>Distort>Spherize. Use 100% for the Amount and Normal for the Mode. Step 4Cut the selection and paste it in order to get the front face of the globe. Step 5Go to Layer>Layer Styles>Gradient Overlay. Apply a gradient from dark red to light blue in linear mode. You can try with Radial as well. Step 6Duplicate the layer and rotate it 45º Also change the gradient colors to light red on top and dark blue at the bottom. This will create a really nice 3D effect and it's super simple. Step 7Select the background layer and go to Layer>Layer Styles>Gradient Overlay. Use (#aa616b) and (#2c354d) for the colors, Radial for the Style and 140% for the Scale. Position the center of the gradient a little bit on top of the center of the globe. To do that just click and hold to move the gradient position while you are in the Gradient Overlay properties. Step 8Select the two globe layers and duplicate them. After that go to Layer>Merge Layers. You will have one layer with the globe. Go to Layer>Layer Styles>Color Overlay. Use black for the color. After that go to Filter>Blur>Gaussian Blur. Use 15 for the radius. Then just resize it and change the opacity to 20%. to create a nice shadow effect. Step 9Select the front face of the globe and edit the Layer Styles. Click then on Inner Shadow and use white for the color, Color Dodge for the Blend Mode at 60% Opacity. Also change the Angle to 100%, Distance to 3 pixesl and Size to 7 pixels. Step 10After the Inner Shadow you will get a nice light effect in your globe. Step 11Select all layers and duplicate them. After that go to Layer>Merge Layers to have one layer with all the image merged. Go to Filter>Blur>Gaussian Blur. Use 20 pixels for the Radius. Step 12Change the Blend Mode to Overlay and you will get a really nice light effect. ConclusionNow just add the text you want and also you can apply a texture on top. I am using a scanline pattern I created. The whole idea of this tutorial was showing how to create a nice 3D globe using only Photoshop, it's a nice technique for logos and icons and it's super simple to achieve. Download the Photoshop FileClick here to download the Photoshop file used for this tutorial |


| You are subscribed to email updates from Abduzeedo | Graphic Design Inspiration and Photoshop Tutorials To stop receiving these emails, you may unsubscribe now. | Email delivery powered by Google |
| Google Inc., 20 West Kinzie, Chicago IL USA 60610 | |
No comments:
Post a Comment