
Abduzeedo - graphic design | design inspiration | tutorials - |

- Daily Inspiration #871
- Filter Forge Contest Winners & Free Patterns for Download
- Book Giveaway Winners - Book #Three by Radim Malinic
- Super Creative Ad Campaigns by Lorenzo Vitturi
- L.A Noire Neon Style in Photoshop
- The Perfect Office #95
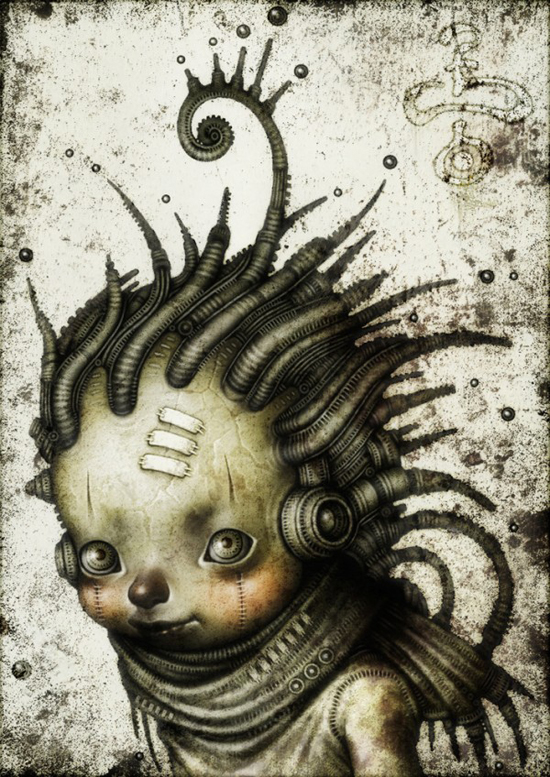
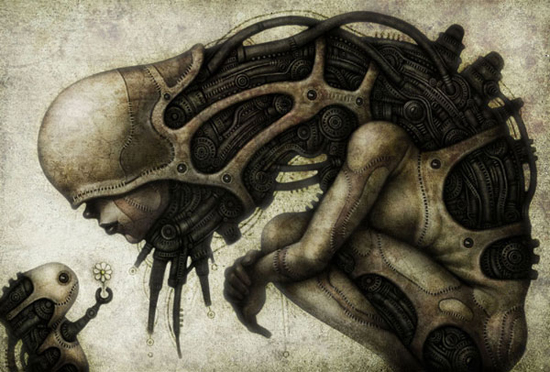
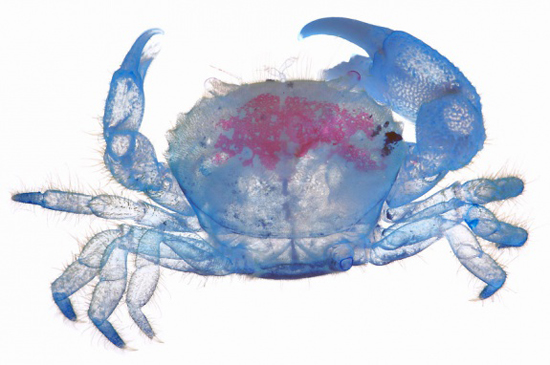
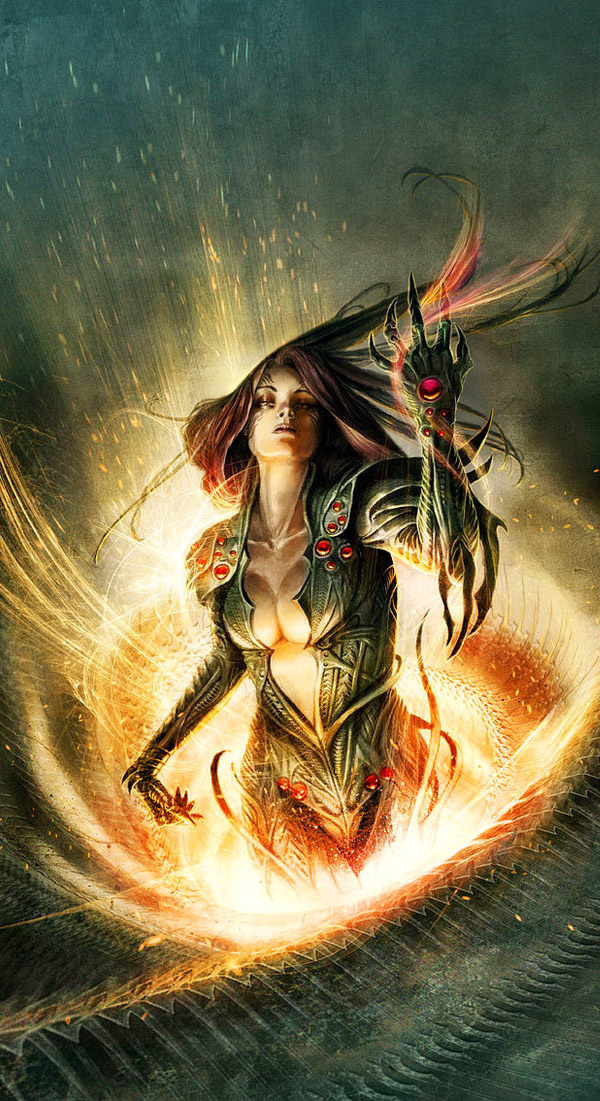
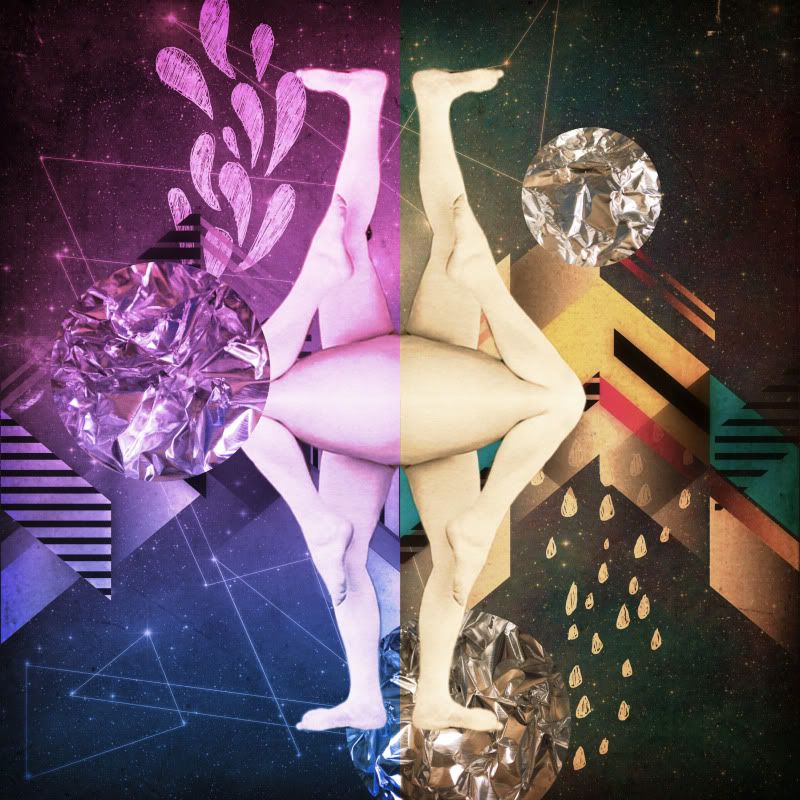
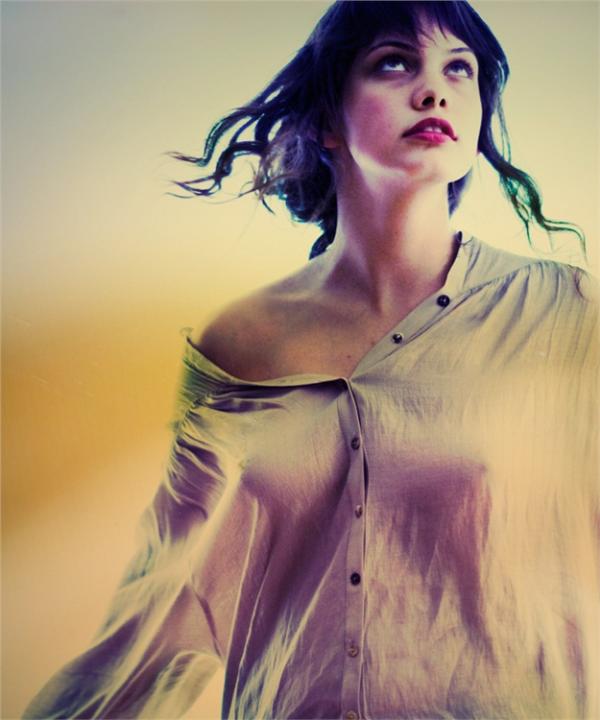
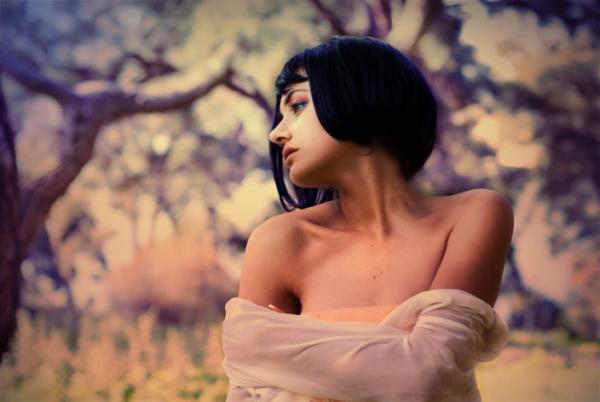
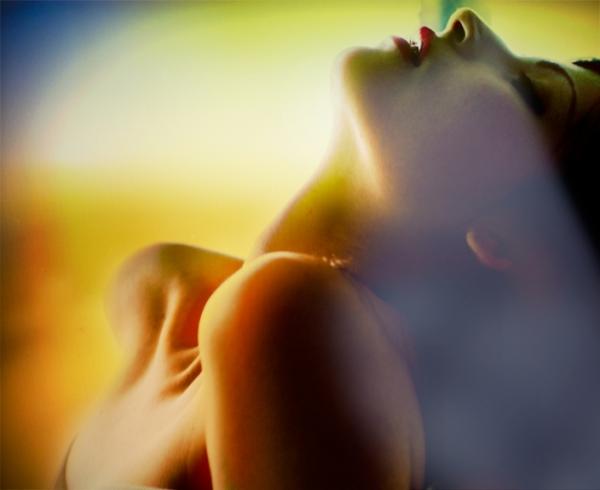
| Posted: 11 Jul 2011 03:16 PM PDT
This post is part of our daily series of posts showing the most inspiring images selected by some of the Abduzeedo's writers and users. If you want to participate and share your graphic design inspiration, just send us, via email, the image with the link from where you found it, also use "Daily Inspiration" in the subject, and don't forget to send your Abduzeedo username; or via Twitter sending to http://twitter.com/abduzeedo.<!--break--> If possible use the HTML code: <p class="imgC"><a href="Link to the page you found the image"><img src="Link to the Image" /></a></p> Do you want to see all images from all Daily Inspirations? Check out http://daily.abduzeedo.comAdam
al b sure
alex tass
Anderson Tomazi
AoiroStudio
Best Bookmarks
blackandwhite
CristianValverde
Danny Roozen
Dennis Henrique
Eric Vasquez
Eugene Kim
Fabiano
Fabio
fantasyinspiration
Feature Me
Gisele
HdK
It's Designed
Joseph
Jurgen Doe
leaflette
Leguian
marco puccini
Meng To
nagiViTy
nenuno
neropece
Taran Uppal
thaeger
The functional Fox
Visions Paradox
Via TwitterSend your suggestions via Twitter to http://twitter.com/abduzeedo using #abdz in the end of the tweet. @diogo_ramoreira
@letmebeinspired
 |
| Filter Forge Contest Winners & Free Patterns for Download Posted: 11 Jul 2011 09:24 AM PDT
A few weeks ago we held a design contest sponsored by Filter Forge with the prize being a free copy of their software up for grabs to the top three contestants. However, just in case you didn't catch that first post, here's a brief explanation of who/what Filter Forge is: Filter Forge is a high-end graphic software allowing you to create visual effects, enhance photos, generate textures, and process images. It features 7500+ free ready-to-use realistic and abstract textures and effects, and a powerful visual editor to create custom ones. Filter Forge can operate as a standalone application or as a plug-in for Photoshop and compatible hosts, under Windows or Mac OS X.So, without further ado, here are your Filter Forge contest winners: Jerry Maninang
Gaggo Ponti
DOTY (email address, didn't send name)
If you are one of the above three winners I will be sending your email addresses to Filter Forge today so that they can send you the serial numbers that validate the trial software you downloaded! Congratulations! Additionally, I'd like to mention that Filter Forge has some new free patterns that everyone can download. They recently released "Freepack 6" which contains nine seamless patters. I've include some samples below. [Download here]
|
| Book Giveaway Winners - Book #Three by Radim Malinic Posted: 11 Jul 2011 09:03 AM PDT
A few weeks ago, we made an interview with Radim Malinic, an illustrator and graphic designer based in London, England. Now he's back this week with a Book Giveaway for his Book #Three, a collection of commercial and experimental work done by Radim during the last couple years.The interview with Radim Malinic / Brand Nu can be viewed via this link http://abduzeedo.com/interview-radim-malinic-aka-brand-nu. We have 5 "Book #Three" to giveaway. To participate is very simple, just leave a comment in the comment box below with a valid email so we can contact you. Update: The Winners are
To get more information about the Book Three, you can click on this link Brandnu.co.uk/Book-Buy .
Book #THREE by Brand Nu from Brand Nu on Vimeo. About Radim Malinic Radim Malinic / Brand Nu is an award winning art director, illustrator and graphic designer based in London, England. Under the name of Brand Nu he works with leading household brands as well as upcoming business, playing a crucial part in the formation of brand language, product advertising, print illustrations and web solutions. For more information on Radim Malinic, check out his website BrandNu.co.uk or follow him on Twitter @brand_nu. You can also check out his personal website at RadimMalinic.co.uk and the website of this studio Black Sands at Black-Sands.co.uk. |
| Super Creative Ad Campaigns by Lorenzo Vitturi Posted: 11 Jul 2011 06:57 AM PDT
In the world of Advertising creativity is everything and Lorenzo Vitturi sure knows how to pull it off. Born in Venice, Italy, Lorenzo is a photographer/designer with a lot of experience and an amazing portifolio. Check out what and how he gets done.<!--break--> For more from Lorenzo Vitturi visit www.lorenzovitturi.com Freddy OlympicsPrint campaign for Freddy the official sponsor of the Italian Team at the Olympic Games in Beijing Big Bang TheatrePalladium theatre print campaign MeltinPotPrint Campaign and Catalogue About the authorHi there! I'm Paulo Canabarro, 25 years old, Brazilian web designer based in Providence RI, USA. I'm truly passionate about design of all kinds. Finding and sharing inspiration has become part of my life. If you have any suggestions or requests just get @ me - pvpcanabarro@gmail.com For some cool stuff make sure to Follow me on twitter! Sponsored Links:
|
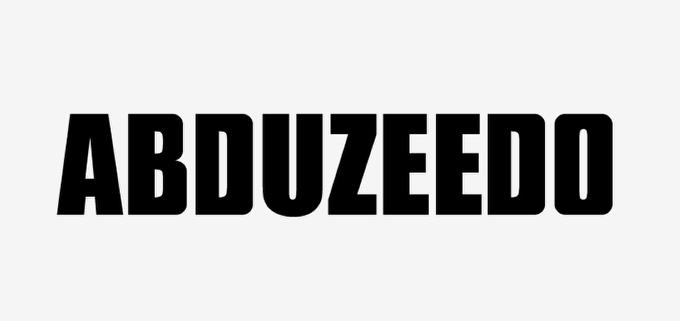
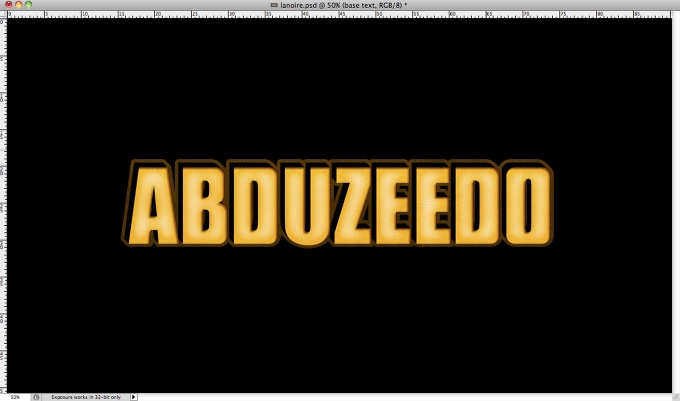
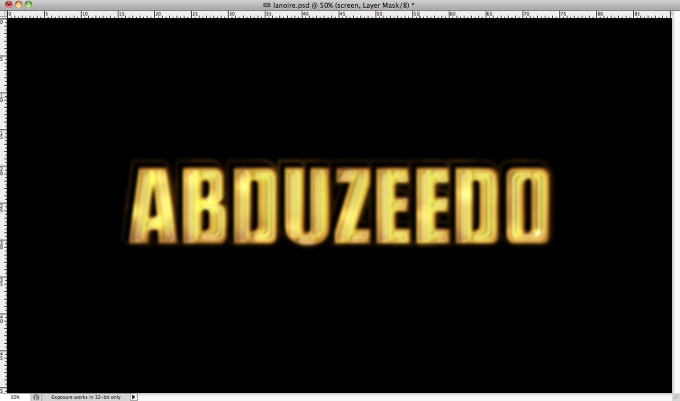
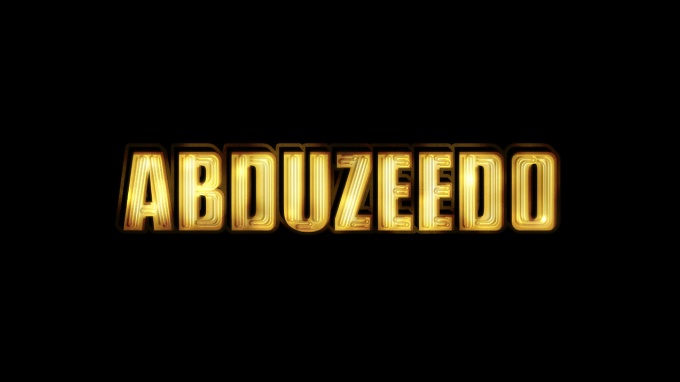
| L.A Noire Neon Style in Photoshop Posted: 10 Jul 2011 10:22 PM PDT
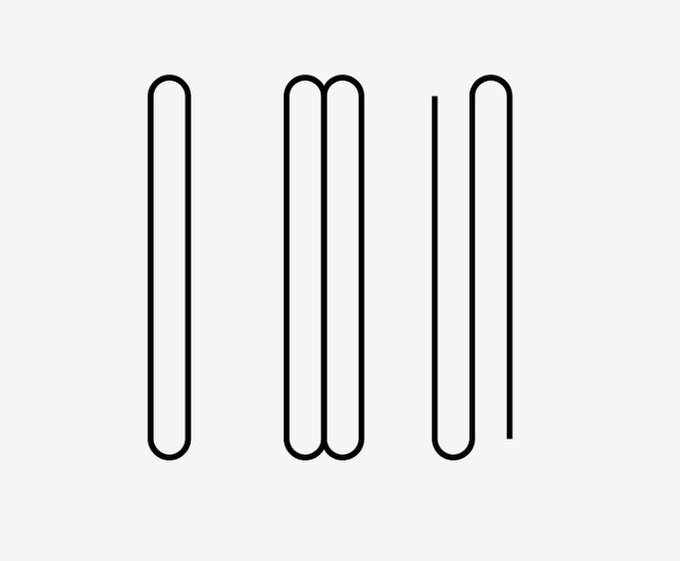
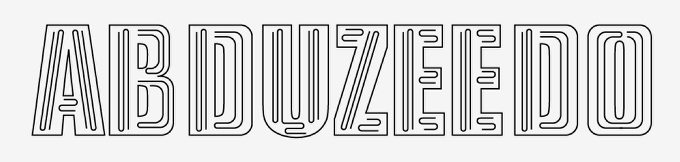
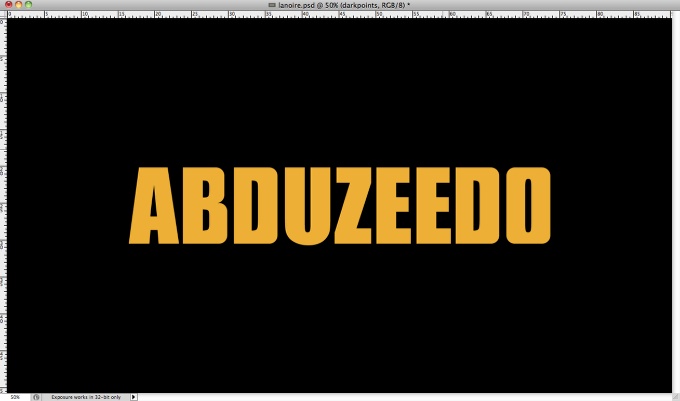
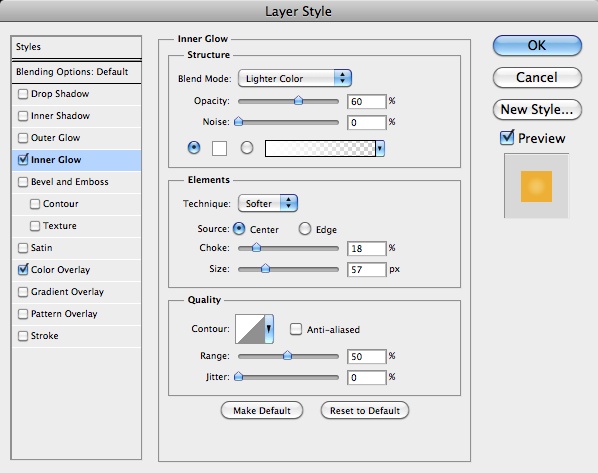
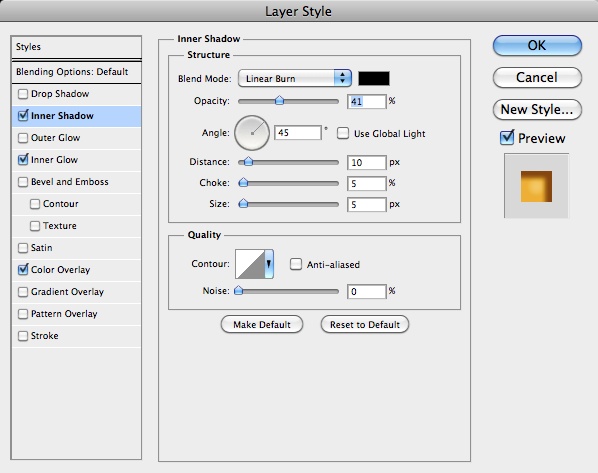
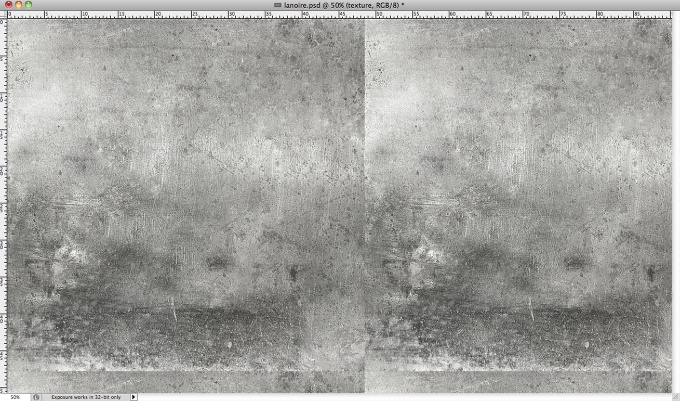
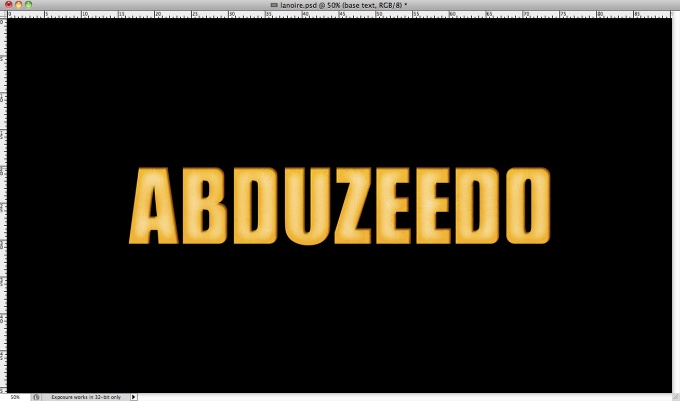
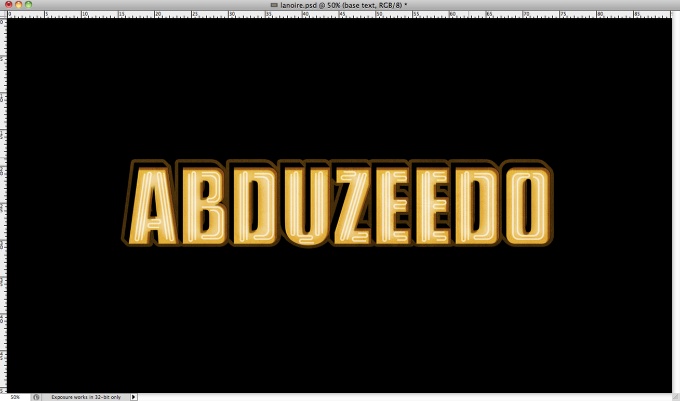
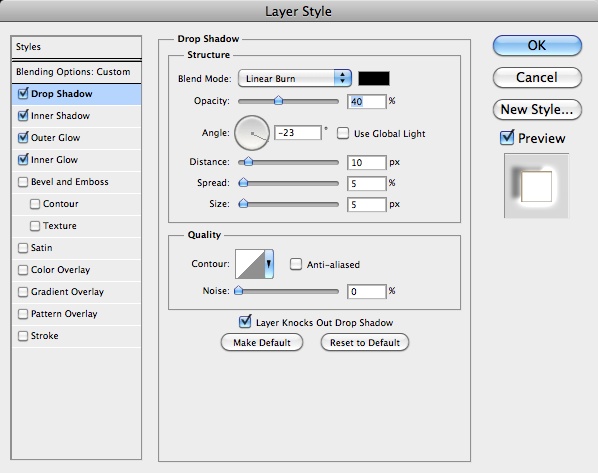
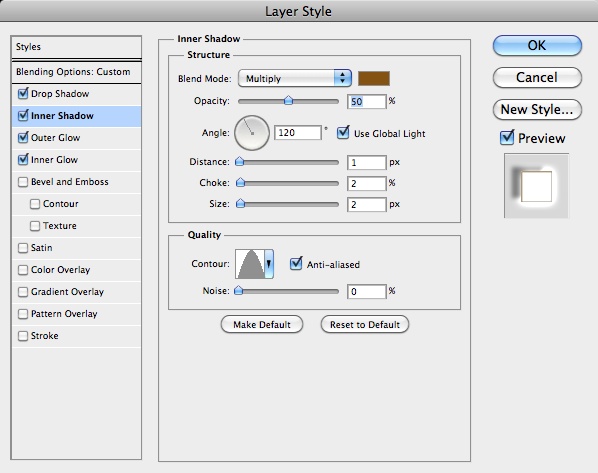
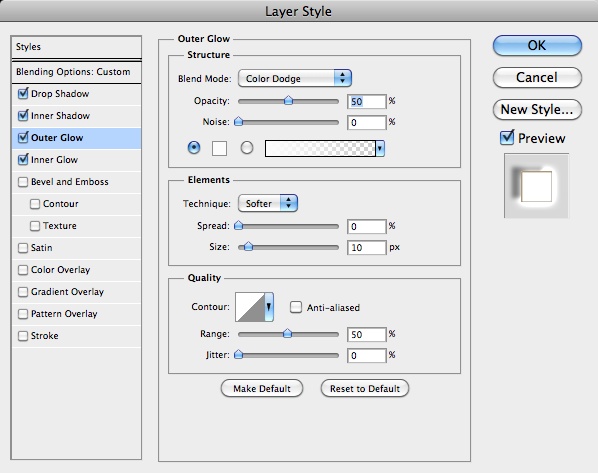
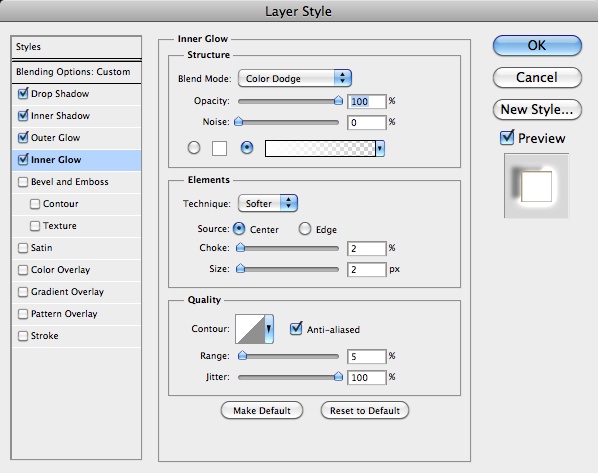
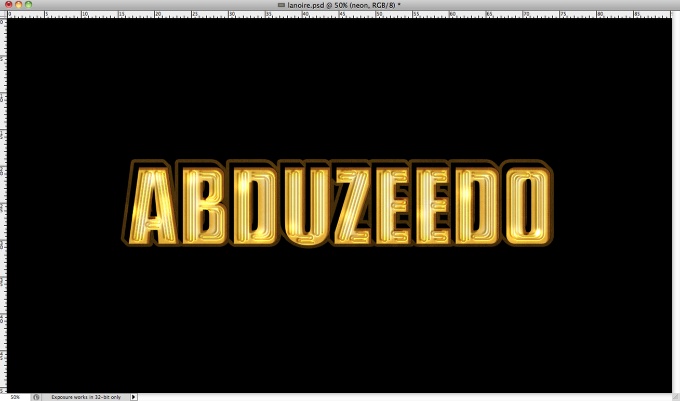
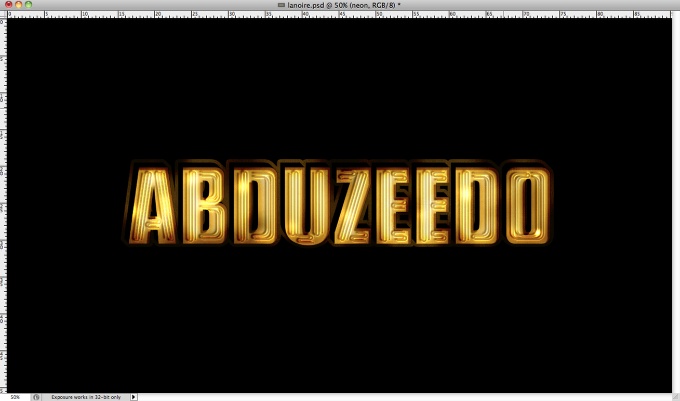
A few months ago I started seeing some poster in San Francisco about this game called L.A Noire. The text effect was really cool, sort of old style neon effect. I know I have done a few tutorials showing how to create this type of effect, but I needed to do that again in Photoshop.So in this tutorial I will show you how to create the text effect like you see in the L.A Noire game cover. The whole tutorial will take about 1-1:30h. It's a bit tricky but it's not easy and the outcome is really cool. Step 1The first thing to do is create the text you will use for the background of the neon. I used Illustrator for this part because it's easier to play with fonts. So basically I am using Arial Black for the font, however I changed the B, D and O so they are not so rounded. Step 2To create the neons use the Rounded Rectangle Tool. Start with a 100% rounded rectangle, then duplicate it and move it so you have one next ot the other. After that with the Direct Selection Tool (A) delete the rounded of the top of one of the rectangles and the bottom of the other. Use the image below for reference. Step 3Create the rest of the letters. Look at the B, D, and O. To create those letters you will basically repeat the previous step however with some different tweaks to make them fit in the character you are working on. Step 4Open Photoshop and create a new document. I am using 2560x1440 for the size. Fill the background with black and then copy the ABDUZEEDO work from Illustrator and paste it in Photoshop. I am using yellow (#f0af17) for the color. Step 5Go to Layer>Layer Styles>Inner Glow. Use Lighter Color for the Blend Mode, 60% for the Opacity, Center for the Source, 20% for the Choke and 60 pixels for the Size. Step 6Select Inner Shadow. Use black for the color, Linear Burn for the Blend Mode, 40% for the Opacity, 45º for the Angle, 10 pixels for the Distance, 5% for the Choke and 5 pixels for the Size. Step 7Now let's use some texture to give more realism. The one I am using is courtesy of Shutterstock and you can find it at http://www.shutterstock.com/pic-20761540/stock-photo-metal-plate-backgro... Step 8Change the texture Blend Mode to Overlay at 30% Opacity. Step 9Duplicate the text and fill the layer with black, after that start duplicating and moving 2 pixels up and left. Repeat that a few times to create a sort of 3D extrusion. After that select all layers you created for that effect and merge them into one (Layer>Merge Layers). Select the layer and go to Layer>Layer Styles>Stroke. Use 14 pixels for the Size, 40% Opacity and (#b47200) for the color. Step 10Copy the neon objects from Illustrator and paste it in Photoshop. Then go to Layer>Layers Styles>Blending Options. Change the Fill Opacity to 0%. Step 11Select Drop Shadow. Use black for the color, Linear Burn for the Blend Mode, 40% for the Opacity, -23% for the Distance, 5% for the Spread, 5 pixels for the Size. Step 12Select Inner Shadow. Use Multiply for the Blend Mode, #865200 for the Color, 50% for the Opacity, 120º for the Angle, 1 pixel for the Distance, 2% for the Choke, 2 pixels for the Size and for the Contour use the same I used in the image below. Step 13Select Outer Glow. For the Blend Mode use Color Dodge at 50% Opacity and white for the Color. Also change the Spread to 0 and the Size to 10 pixels. Step 14Select Inner Glow. Then use Color Dodge for the Blend Mode at 100% Opacity. Also change the Source to Center, Choke to 2%, Size to 2 pixels, Range to 5% and Jitter to 100%. Step 15The neon is nice but it need some highlights. To do that is pretty simple. Create a folder in the Layers Palette and change its Blend Mode to Color Dodge. Add a layer inside the folder and then with the Brush Tool (B) a very soft brush and white for the color start painting some areas you want to highlight. You can see in the image below in in the letters how some have this brighter area. Step 16Now let's do the same but this time to create some dark spots. So add a new folder but this time change the Blend Mode to Linear Burn at 80%. Then add the layer inside the folder and with the Brush Tool (B) and a soft brush with black for the color paint some dark areas. Use the image below for reference. Step 17Select all layers and duplicate them, after that merge all duplicated layers into one. Go to Filter>Blur>Gaussian Blur. Use 5 pixels for the Radius. ConclusionChange the Blend Mode to screen and with the Eraser Tool (E) delete most of the layer leaving only the areas that are close to the bright spots. As you can see to create the effect is pretty simple, basically some layer styles and blend modes, but it's a nice technique to use in future projects, especially icons. Now it's up to you :) Download the Photoshop FileDownload the Photoshop file used for this tutorial |
| Posted: 10 Jul 2011 09:24 PM PDT
We've seen some great gadgets and equipment for designers. So many cool stuff, that we could actually assemble infinite perfect office spaces! Every week we'll assemble a perfect office, and we'd like you to help us. What equipment would the perfect office have?<!--break--> Not only gadgets and equipment, but also furniture, sound system, gaming stuff (for lunch time!). A designer is totally allowed to dream with the perfect office, and that's what we're gonna do here! Also, tell us your suggestions, or even better, you may tell us via twitter (mine and fabio's), using #abdz_ofc so we can check it. Alright? I hope you guys enjoy this brief selection. Cheers! ;) Mhin Clock by James Tobin James Tobin is a young Irish designer working in the US who recently created the Mhin Clock. Inspired by living in a busy city in which people are always on the go, the Mhin clock documents time with ambiguity to help relax you and keep you from constant worry about the time. Mhin displays time in a linear fashion with silence instead of the constant ticking reminder of time going by. (at Design Milk) Coleman Portable Propane Coffeemaker It doesn't matter whether you're emerging from a tent for a long day of fishing or simply too lazy to run through Starbucks prior to a big day of tailgating — you're going to need some coffee. Which is where the Coleman Portable Propane Coffeemaker comes in. Powered by a single 16.4 oz propane cylinder, this road-ready gadget brews up 10 cups of joe in under 20 minutes, giving you plenty of time to get ready for your day. (at Uncrate) ¡No se haga bolas! Organizer From @masiosarestudio, a wool felt organizer wrapped in elastic cord that expands to hold more desktop objects as they're added. (at Moco Loco) Pixbag SLR Camera Wraps These stylish Pixbag SLR Camera Wraps by DaWanda(like European version of Etsy) seller Chocmuf, made from a large assortment of bright colors, patterns and prints. Available in 3 different sizes for different cameras. (at Like Cool) iPhone SLR Mount The iPhone SLR Mount might seem a bit over the top but it strikes a cord with the camera geek inside. The adapter, which encompasses a case, extension tubes and some custom machined parts to link it all together, lets you attach any Nikon or Canon EOS lenses to the back of your iPhone 4 — giving the 5 megapixel sensor a whole new world of prime glass to interpret. (at Cool Hunting) |


| You are subscribed to email updates from Abduzeedo | Graphic Design Inspiration and Photoshop Tutorials To stop receiving these emails, you may unsubscribe now. | Email delivery powered by Google |
| Google Inc., 20 West Kinzie, Chicago IL USA 60610 | |
No comments:
Post a Comment